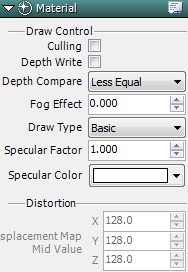
üĪCulling
ü@
ü@Draw around the back side of a polygon.
üĪDepth Recording
ü@Prevent rendering of duplicate polygons.
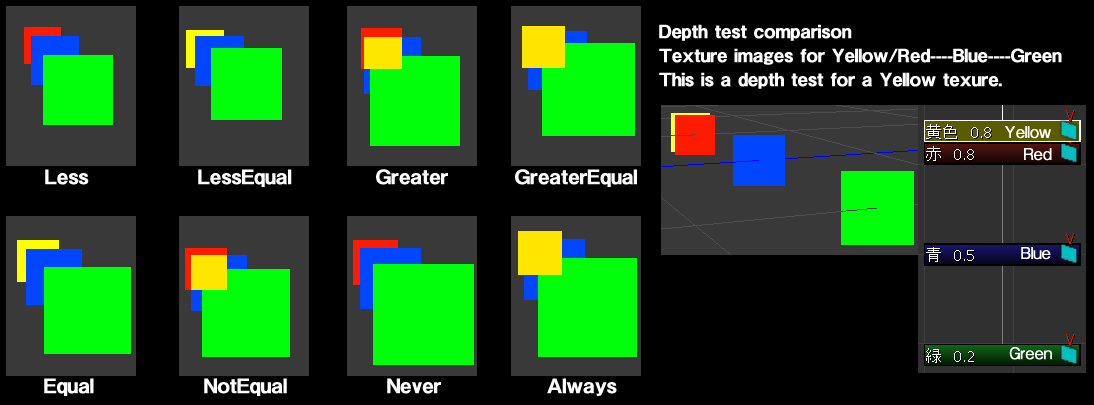
üĪDepth Test
ü@Set Procedure for Depth Comparison
| Less | ü@If the depth value of the pixels to be drawn is "smaller" then draw them. |
| Less Equal | ü@This is the one normally selected. If the depth value of the pixels to be drawn is "smaller or the same as" the depth value then draw them. |
| Greater | ü@Set if the clear depth value is negative. If the depth value of the pixels to be drawn "is larger" then draw them. |
| Greater Equal | ü@Set if the clear depth value is negative. If the depth value of the pixels to be drawn is "greater than or the same" then draw them. |
| Equal | ü@Display the pixels when their depth value is the same. Setting only for special expressions. |
| Not Equal | ü@Display pixels when the pixel depth value is anything other than the same. Setting only for special expressions. |
| Never | ü@Never display them. Setting only for special expressions. |
| Always | ü@Consistently display effects at hand. Always draw pixels regardless of their depth value. |
üĪFog Effect
ü@When fog is applied, the degree of its effect is set between 0.0 and 1.0.
üĪLighting
ü@Set light to ON or OFF.üifor Model nodes onlyüj
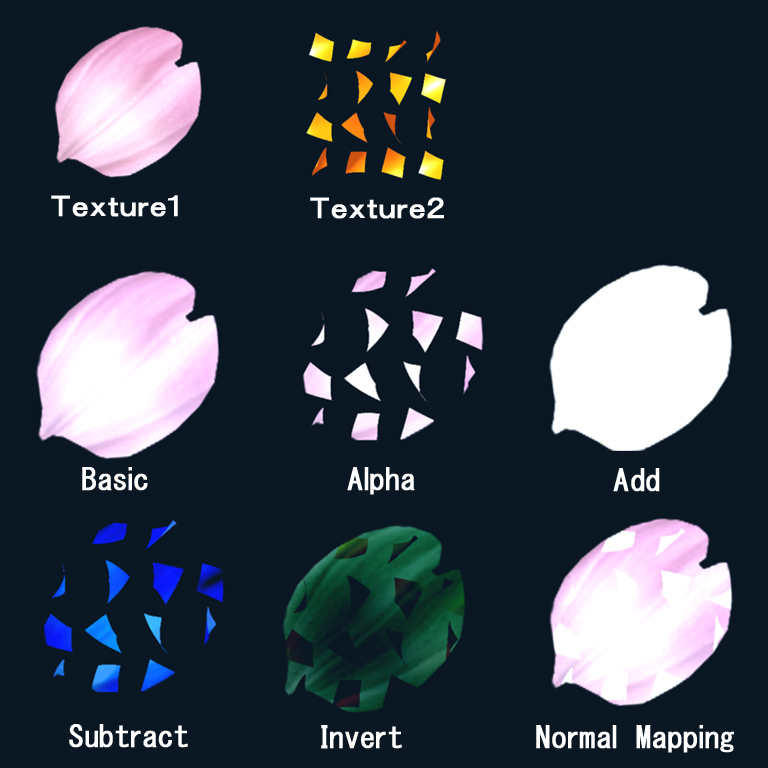
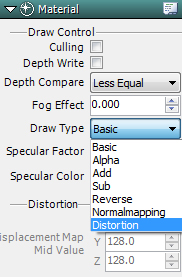
üĪDrawing Type
ü@Specify the synthesis method for textures. ü”See below for details.
üĪSpecular Coefficient
ü@Set the sharpness used for the specular. The drawing type can only be set for normal mapping.
üĪSpecular Color
ü@Set the specular color. The drawing type can only be set for normal mapping.
üĪDistortion
ü@Set the central value for the distortion. Set R and G values between 0 and 255. The initial center value is 128.
ć@Change the "Drawing Type" for the Material to "Distortion".
ćASet texture to be distorted to Texture 1.
ćBSet distorted texture for Texture 2.
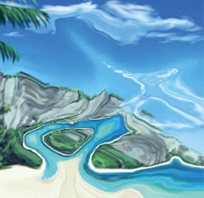
 In this image Texture 2 was cropped and animated.
Here is a detailed explanation for displacement maps.
Distortionü@Displacement Maps
üEMethod for Distorting Backgrounds
Make the file name for Texture 1 "@backbuffer" and set Mapping Type to "Projection" to distort the background.
üĪNormal Mapping
ü@üENormal mapping the 2nd image and the material by selecting "Normal Mapping" will result in a visually different image from typical normal mapping.
ü@üEYou can indicate at the pixel level the normal direction as a texture and create uneven light reflections.
ü@üECurrently, normal map settings may be configured but we intend to make further functional improvements in future upgrades.Not a recommendedfunction.
ü@üEModels and stripes are not compatible with normal mappingüieven though there is normal mapping in the material-image type tab).
Settings
ć@Select texture to apply normal mapping to Texture 1.
ćASet Normal Mapping for Texture 2.
ćBSet material setting to "Normal Mapping".
ćCAdjust "Specular Coefficient" and "Specular Color".

 This what it looks like.
ü”The following are the various drawing types.üifrom Version 1.8)
| Basic | Enable settings for only Texture 1 |
| Alpha | Synthesize transparency of Texture 1 and Texture 2 |
| Add | Synthesize by adding Texture 2 to Texture 1 |
| Subtract | Synthesize by subtracting Texture 2 from Texture 1 |
| Invert | Synthesize by inverting Texture 2 and combining with Texture 1 |
| Normal Mapping | Set Texture 1 to a normal texture and Texture 2 to normal map and apply light effects. ü”Scrolling both Texture 2 with only normal mapping and Texture 1 at the same time is possible. |
| Distortion | Project the distortion level of Texture 2 onto Texture 1. |